| GRAIN INDUSTRIES | Dependable Products Dependable Support |
| Home | Features | Installation | FAQ's | Operator's Manual | Ordering Information | Sales | Support |
| The GI-100/1000 is a professional quality, low distortion, AM transmitter unit that is designed for continuous outdoor use. It operates in the standard AM broadcast band and can be operated unlicensed in accordance with Part 15 of the FCC code. It is supplied either as a single unit or with accessories and must be properly installed for optimum performance. The six steps summarized below outline the procedure for a successful installation. | 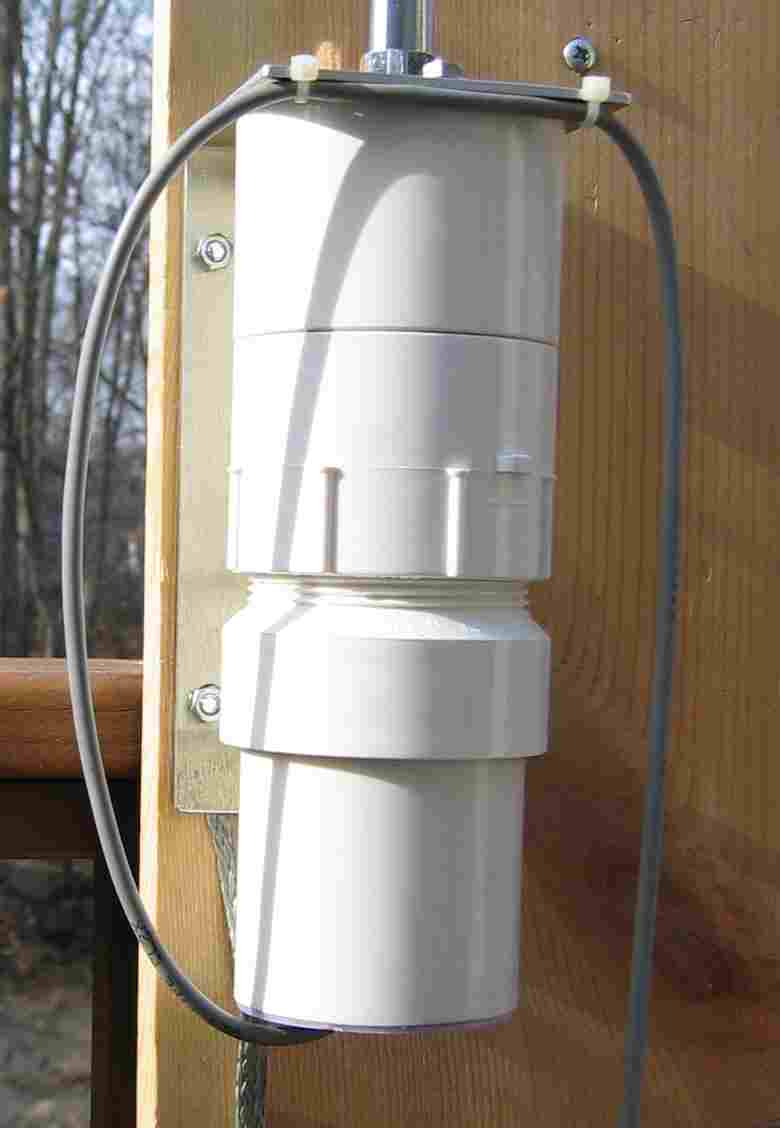 |
INSTALLATION OVERVIEW
Following is an overview of the installation requirements for the Model GI-100/1000. Complete, detailed installation information is included in the OPERATOR'S MANUAL, which must be consulted when completing an actual installation.
STEP 1. READ ALL SAFETY
INSTRUCTIONS
The GI100/1000 does not embody any particularly hazardous
elements, however there are potentially hazardous
situations that might be incurred during installation.
The person installing the unit must be aware of these
situations to insure personal safety.
STEP 2. INSTALL TRANSMITTER UNIT
After selecting a suitable site, the transmitter must be
physically mounted to a stable structure using standard
hardware. Once mounted, a good ground connection to it
must be secured and the 102-inch whip antenna screwed
into the integral antenna mount.
STEP 3. INSTALL “STUDIO
EQUIPMENT”
The transmitter requires a power source (12 Volts DC),
which can from a “wall wart” or from a vehicle
battery. It also requires a low level audio source.
Connections must be made from these two sources to a
cable, and that cable must be safely run from the
“studio” location to the transmitter. Grain
Industries has several options available for “studio
equipment” (ORDERING
INFORMATION), or the installer can provide his own.
Complete requirement specifications for the power source
and the audio source are given in the OPERATOR'S
MANUAL.
STEP 4. ATTACH CABLE TO
TRANSMITTER
After the cable has been run and secured from the
“studio equipment” to the transmitter, three
screw connections must be made to the transmitter.
STEP 5. TUNE AND SECURE THE
TRANSMITTER
A selection of a suitable transmitter frequency must be
made to avoid interference with other transmissions, and
the transmitter tuned to that frequency. Once tuned, the
transmitter is closed up and the cable secured. Once this
is done, the transmitter will operate unattended for
years, even in an outdoor environment and in all seasons.
STEP 6. OPERATE
Once installed, the transmitter can be operated from the
“studio”. The transmitter's tolerance to a wide
range of DC supply voltages as well as its low distortion
modulation control over an extremely wide range of audio
input levels (FEATURES)
make operation extremely simple for everyone, permitting
individuals with no technical background to operate it
without assistance.